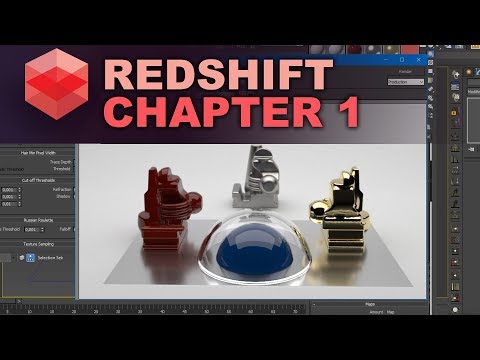
Hello! Andrew Krivulya Charly - with you and
this is the first part of my course by Redshift
for 3dsmax
We begin this tutorial with installing the plugin.
You can download the latest version at
Redshift forum - by clicking on the link
https://www.redshift3d.com/forums
and in New Version Announcements tab
choose the latest version.
At this point - it is 2.0.80
You can download it by clicking on the download link
After that - run the installation, click Next
and then read the license terms
click I Agree.
Then - select the desired version and
click Next.
In the next window - write "yes", thereby
agreeing to the terms of that
we use node-locked license and press
install.
Once the installation is complete
Redshift offer start licensing tool
to activate the license.
But I have it already activated - so
I click FINISH.
Then we go in 3dsmax and choose Redshift.
Now let's talk about the system requirements
of this render.
To see them - go to the Support =>
Documentation.
Then, go to Getting Started and click on
System Requirements
There certainly are listed
minimum requirements with which
you can run Redshift.
I even ran it on an old GeForce 760.
But the full power of the rendering -
you will experience with at least one
980Ti or a brand new 1080.
I, in turn, will show
rendering work on the farm
FORRENDER and using a three-server
980Ti.
Each - 6GB of VRAM.
Why 980Ti, no less?
Because of complex scenes, on older
graphics cards
you won't have a tangible performance,
for which praise Redshift.
Here, in the documentation, you can read about
basic settings and Redshift features.
So if something is not clear -
Welcome to the HELP.
I, in turn - will try
talk about them in this course.
And I'll start talk about rendering methods in Redshift.
There are only three.
but before we analyze these
techniques - let's first download the scene
for this tutorial
which you will find on my blog.
Go to the charlytuts.blogspot.com
Go to Materials4Tuts
Scroll down the page and click
on "Часть 1" link in the seventh paragraph
entitled "Материалы для базового курса
по Redshift"
After that - a scene from the archive run.
Then, go to the Rendering menu and in
Output tab
turn on a first rendering method - Progressive.
with Enable checkbox.
Progressive has a fixed number of samples, but
This method is not effective for
the final result.
For a quick preview and settings - it is a very good
Let's click Render and see how it
works.
As you can see - its work is similar to the Vray Progressive -
When the picture is not rendered by
pieces -
buckets,
and immediately the noise goes away gradually with each
calculated sample.
Why this method is not effective to render
the final image?
Because the emission samples
It occurs throughout the picture, even there -
where this is not necessary.
That is to say that on a white background that glass -
where you need more samples
or in any other location and is emitted beam
with the same number of samples.
In this case - is 1,024.
It is much more efficient to use the second method -
buckets rendering.
When we set a fixed
minimum and maximum
the number of samples, and the engine decides for himself -
where the quantity used.
That is, in the complex noisy surfaces -
it will emit the maximum
number, and where it is not necessary - the minimum.
Bucket Rendering is turned on
off by progressive
and this is the second method.
And the third method - ActiveShadeMod or so
called Redshift Live.
To switch to this mode - at Target
choose ActiveShadeMod, and Renderer -
Redshift.
Then - click Render.
Then opens a ActiveShade window in which - we
immediately will see the changes in the scene.
For example,
If you go in the perspective and rotate the viewport
we immediately will see these changes.
Also, if you choose a light source and
change its color -
we immediately see the changes.
Who is know Octane, Corona and VrayRT
They know this rendering method.
But I don't often use it. So long as it
not a full Redshift engine
and it needs to be more refined.
In my work for preview - I am using
Progressive, and on final render -
Bucket rendering.
So, now you know this methods =)
Now let's start analyze the optimization techniques in
the scene and how to fix the noise on the render.
To begin with - add special
Render Elements.
to identify the noise in the scene.
If you use AO in your scene
then add this pass.
In my scene - I haven't it. Therefore I miss
this render pass.
Then the next render elements are
GI
Reflection
Refraction and of course - Shadows.
to see the noise from the light sources.
For this scene - these four passes
are enough.
Then go to the Output.
Min and Max Samples = 4
Temporarily turn off GI and in Effects - Redshift
Bokeh.
And also HDRi in Environment.
Now, move on to the materials and turn off all
textures, as in the beginning - they are not required.
Click Render.
So. This scene in HD resolution was
rendered with a noise about 2 seconds.
I have not included Render Element at this moment.
I recommend looking at all the noise in the
1: 1 scale.
Not more.
Since most users
watching all your renderings in 100% scale and
don't zoomed your image.
And why?
At the time - I had a mania to clean
all of the noise in a scale of 2: 1 or more.
but it doesn't make a sense
So,
first of all - turn on render elements.
The second point that I want to pay
your attention - it's the most important rule
when you working with Redshift.
Now in Output - minimum and
the maximum number of samples = 4
That is to the whole picture - leaving
4 fixed sample.
But also we have local Redshift samples.
And their using give you a better
result.
Yes, this is adds time to set up
each material.
Basically - you can not bother and
use Sample Override to some of the parameters.
But, very often - I setup each
material separately.
I will show two methods in this tutorial.
Let's click again on Render, to
see all Render Elements.
Thus, the first element - RSShadow. here we
see a lot of noise and we can remove it
by increasing
the number of samples
on the light source.
Right from my experience - I recommend
you to put the value from 256 to 512 samples.
Above - I didn't use
While it may be at some
complex scenes - you will need and more.
But we have a simple scene,
so first let's put - 256
samples and look at the result.
Previous picture with the noise in the shadows
was rendered 6 seconds on
FORRENDER farm with 3 GeForce 980Ti
So, with 256 samples on
the light source - we got rendering about 24s
By the way, to see how many
cards participates in the process of rendering -
go to the System and scroll down.
So, look at the picture and on the Shadow pass
in 1: 1 scale.
We can see that the noise is almost imperceptible.
Just want
warn you that on the pass - it always
more, but when the pass is multiply
with a beauty pass - we naturally see less
noisy results.
Therefore, I think that we can stay at a value of 256
samples
On the Refraction pass - there is practically no noise,
therefore we don't increase the samples.
But on the Reflection pass - he is clearly noticeable.
Therefore, in rendering settings - Sample Override
on Reflection = 256 passes.
After rendering - look what happened
in Reflection pass.
With 256 samples - the noise is gone, but not completely.
So, let's put 512 samples and
make a new Render.
So, for the 1m28s - clean Reflection.
Since we are satisfied with the result on Reflection
pass - it can be removed.
Go to the Render Setup and remove the Reflection pass
in Render Elements.
It remains to include GI and remove noise in this pass
In GI, I use a bunch of BF + BF
Since it is not only my opinion -
it is most effective at rendering and turns
better quality than with other methods.
Of all the GI methods - you can
read in the HELP
Everything is writed in great detail.
And I continue the tutorial.
So. let's render the image.
So,
With the turned on GI - picture was rendered
for 2m40s
On GI pass, we see a clear noise that
naturally, we can remove with the increase
the number of samples.
So put 128 samples and render.
I think this value is sufficient.
Basically I always stop on it.
For 3m20s - we got a clear picture.
Now - turn on Redshift Bokeh
and render the image.
So, after the render - we immediately see
artifacts that we have to clean up in the
Unified Samples tab.
Since DoF, Motion Blur and Antialiasing
don't have local samples configuration.
So put to maximum value of samples = 32
and render the image.
But, once I want to note that all
Samples that you set up locally
or were change in Override -
will be considered.
Even if you set the min and max samples = 1.
This won't affect those parts where we have
the local samples.
This setting only affects the quality of DoF
Antialiasing and Motion Blur.
By the way, note the paradox -
The scene has rendered for 58 seconds.
Apparently, when a lot of noise and there
some artifacts - Redshift rendering harder
the scene than - when we corrected
all these errors.
Let's turn on all textures that we
turned off at the beginning of this tutorial.
Incidentally, due to this the glass can be noisy,
thus providing for the moment -
I put 512 samples in Refraction Override.
Yet, optimization settings are influence on render time
but I rarely
use them. Since mostly -
render time suits me.
But if suddenly, you won't satisfied the render time
and you want to somehow reduce it -
go to render settings => optimisation tab
and there you can reduce
the number of reflections and refractions,
and - the sum of these values.
That is - you just copy a main render,
that you have with default values.
Then reduce the reflection and refraction to 1
and put the sum of these values in combined.
Then gradually increase and
look at the result.
If it turned out identical with
lower values -
it is possible to leave them
and it is naturally a little cut
render time.
So, I'm a little distracted. I continue to turn on
the textures.
By the way, I want to note that I specifically
left it in 8K resolution,
to show - how fast
Redshift even such this textures,
though them big for this resolution.
But render even considered at one
980Ti.
So, all the textures turned on.
Without textures and enlarged Sample Override
on Refraction
scene was rendered for 58 seconds.
Let us see how much it will render
as amended.
So, all image with all
textures and an increased sampling on Refraction
Override - was rendered for 1m24s on the
three 980Ti graphics cards in HD resolution.
I think it's cool!
Given that we used DoF. reflecting,
and the refractive materials.
In this - the fight against noise ended.
You can still read about Unified Sampling
in Redshift Documentation.
And there is also a separate link to information
about Noise and it deleting.
Finally, I want to talk about the Samling Override.
For what it can be used?
For example, you change the lighting or made
changes to the materials and
you don't want to wait again - 1m24s.
In Sample Override you can put less
the number of samples for all parameters
and quickly render this picture.
Of course - we can use progressive
rendering,
but sometimes you want to render the result
with a buckets.
Therefore Sampling Override helps us
in that.
Each parameter has two options - replace
samples or multiply the local samples on
putted up a number in the Scale.
For example,
all local samples = 16.
That putting sample scale = 2
you thus multiply 16 by this number.
And will have 32 sample.
It is also useful a few more options to you with
setting the scene.
In Optimization you can find Global Overrides tab
which allows you to turn off some
Effect.
For example - the reflection and refraction thereby
speeding up render time.
So, this is the end =) With you
was - Krivulya Andrew Charly.
If you will press the "thumbs up" -
I would be very nice! After all, I create it
for you.
Subscribe to the channel by pressing the
Subscribe,
not to miss the new releases.
Share with your friends via the share button.
Do not be greedy! After all, they
also want to get this knowledge.
Also, if you click on the icon with the letter "B" -
You will be in my home group
Vkontakte.
Write your suggestions, comments and questions.
If you want to see
the previous lesson - which I consider
Ornatrix tools, feel free to click on the preview.
If you want to see my model
shops or my portfolio -
then click on the icons - 3ddd, CGTrader and Artstation.
See you in the next lesson! Peace for everyone!
 For more infomation >> Fitch Ratings informa que Trump representa un riesgo para las relaciones económicas internacionales - Duration: 0:20.
  For more infomation >> Flynn, en el ojo del huracán por presuntas conversaciones no autorizadas con embajador de Rusia - Duration: 2:08.
  For more infomation >> Trump advierte que puede emitir un nuevo veto migratorio tras fallo de la Corte del Noveno Circuito - Duration: 2:27.
  For more infomation >> DAVIDKOV, HEROE DEL PARTIDO! | Dream League Soccer Classic - Duration: 7:09.
  For more infomation >> Posesión de Tom Price como secretario de Salud deja en vilo a beneficiarios de Obamacare - Duration: 2:08.
  For more infomation >> LEGO Ninjago season 5 episode 2 Cartoon Ninjago for Russian 46 a series of Cartoons for boys - Duration: 21:03.
  For more infomation >> Artist Zayn Malik Live
 For more infomation >> MSP - Duration: 5:51.
  For more infomation >> Cars Cartoons for children Cars Lightning McQueen Cartoon games for Boys Cartoon Game Walkthrough - Duration: 10:45.
 For more infomation >> Cars Lightning McQueen Cartoons about Cars Cartoons for children New Best Cartoons 2017 Game - Duration: 12:13.
  For more infomation >> Hyundai i10 1.0I I-MOTION COMFORT - Duration: 1:32.
  For more infomation >> Hyundai i10 1.0I I-MOTION COMFORT CRUISE CONTROL - Duration: 1:09.
  For more infomation >> Toyota Yaris 1.3 VVT-i Terra 5-deurs Airco Radio CD-speler CDV - Duration: 1:08.
  For more infomation >> Toyota Auris 1.6 VVT-i Sol Business Navigatie **NIEUWE APK**12 maanden Toyota Eurocare!** - Duration: 1:06.
 For more infomation >> close battle in PBB(read desc or turn on CC also sorry for lag in vid xD) - Duration: 2:03.


 For more infomation >> Toyota Avensis Wagon 1.8 VVTi Luna Business - Duration: 1:45.
 For more infomation >> 美國小朋友看土狼彼得森被最痛昆蟲螫,都嚇得魂快不見了 (中文字幕cc) - Duration: 9:23.
  For more infomation >> Scelte difficili: la zecca succhiasangue o il ballo? 🖖034 - Duration: 3:14.
  For more infomation >> Melhores exercícios para queimar gordura e perder barriga - Duration: 4:18.
  For more infomation >> POSSO ENTRAR NA PISCINA COM PONTOS NO JOELHO? - Duration: 1:20.
No comments:
Post a Comment