Today, we're going to learn how to change a gear cable.
There are many reasons why you would do this.
Gear cables wear out, get kinked, and stop working smoothly after a while.
The reason I'm changing mine today is a bit more—complex.
When I got this bike the dropper cable was routed to the left side of the frame and the
gear cable was run to the right.
This made the cables rub on the head tube and it didn't look neat, and it was freaking
me out man!
Obsessing over things like this is just a sign that you love you bike, so today I'll
be installing a longer cable so I can route it the way I like.e
Let's do a general overview of the process and then talk details.
First, shift your bike into the smallest gear and bring your barrel adjuster all the way
in.
Loosen the clamp on the derailleur, and remove your old cable.
You'll need to knock this cap off or cut the end to get it through.
Up at the shifter you'll need to find the access port, which is sometimes shielded with
a cap.
The cable should come out with a metal stop on the end.
Most of you are going to be changing your cable and your housing, so it would be a good
idea to pick up a pair of cable cutters.
You can use end nippers or dykes but, these are much easier.
You can use your old housing as a guide, but if you're changing something else on the
bike like your bars or your derailleur, you may need to dry fit it to determine the length.
That's what I'm doing.
Here, I'm fitting it into the shifter, making a nice wide bend, and trying to match the
length of the brake hose to keep things neat.
As I run the cable, I'm keeping in mind that too long is better than too short.
We can always go back and cut it more.
Once I'm happy with the length, I can cut the housing and ONLY the housing.
Don't cut the cable until the very end.
Now that we've dry fit the housing, it's time to feed the cable into the shifter.
Again, this takes some poking around.
Assuming you've shifted to the smallest gear, it should feed in straight and come
out the other side.
Most cable sets will come with these housing ends.
You'll need to put one of these on the cable first, feed the cable into the housing, and
then fit everything together.
If you put the end on the housing first you'll never get the cable in.
At this point, the cable should be poking out of the other end of the housing, so put
an end on that side too.
Now identify your cable stay and route the cable accordingly.
If you measured your housing correctly, there should be a nice, wide bend there.
Pull the cable as tight as possible and fasten the clamp.
Cut the cable, adjust your derailleur, stick an end on it, and you're done.
If you've never adjusted a derailleur before, check the description for a link to another
one of my videos.
Now, let's talk details.
First of all there are two main types of cable housing.
This is stranded.
Cheaper housings will have a solid core.
When you cut solid housing it'll be all jagged at the end, so you need to smooth it
out on a bench grinder or cut diagonally again to get it as flat as possible.
This is important since it can interfere with the cable.
Most housings will have a little plastic tube in them, and you'll need to do a little
poking to get the cable through initially.
Sometimes the cable will get stuck at the other end.
In this case, you want to back it off and punch it through.
When initially fastening the cable to the derailleur, you should tighten it down but
not crazy tight.
Chances are you'll need to tighten it again once you start working the shifter.
Things settle into place after a few cycles, and you'll notice a ton of slack in the
cable.
At that point you want to tighten it again.
A lot of mechanics have one of these guys…a third hand.
This thing is great for getting the cable tension just right, but if you don't have
one there's a hack.
Hold the cable with your hand and place your thumb on the derailleur.
Push the derailleur up the cassette ever so slightly, and tighten the clamp.
When you release it there should be good tension on the cable.
Now you can cycle the gears some more to make sure it really is tight, and tune your derailleur
as needed.
If you're just swapping your cable, chances are you'll only need to set the cable tension.
Make sure that when you're in the smallest gear, one click shifts you up one cog.
If it doesn't quite make it, you'll need to increase your tension by unscrewing the
barrel slightly.
Keep shifting up and down and adjusting the tension until you can make it through the
whole cassette smoothly.
If you need to back the barrel out like crazy, then bring it back in and pull the cable tighter.
In a couple of weeks you'll probably need to tighten the cable again as things stretch
and settle into place.
Sometimes while messing with all of this you'll fray the end of the cable.
This isn't necessarily a death sentence.
Start at the point where the cable isn't frayed, and twist with your fingers.
Work your way down the cable until you reach the end.
If everything is installed, put one of these caps on and squeeze it with pliers or crimpers.
I've seen some people squeeze end caps with clippers too.
Sometimes you'll find that your shifting works great on the first few gears, but then
gets all wonky further up the cassette.
I left a link in the description which shows you how to deal with that problem specifically.
Lastly, make sure you leave a few inches of cable on the end.
You never know when you'll need to works on your drivetrain and cut some cable off
to make it neat again.
So that's it!
If you need tools or supplies, all the links are below.
If you watched this video and are still not confident in swapping a cable, it's nothing
to be ashamed of.
Cables take a little more finesse to get right than let's say, pedals.
Bike shops do not charge very much for cable replacements, and of course they have all
the right ends and fittings to do the job right.
If you have other questions, head down to the comments and hopefully me or someone will
answer you.
Thanks for riding with me today, and I'll see you next time.
 For more infomation >> A VINGANÇA DOS VIKINGS ( Erik, o conquistador)1961 - Filme completo legendado - Duration: 1:30:01.
  For more infomation >> Duelo en República Dominicana por asesinato de periodistas mientras transmitían su programa - Duration: 2:05.
  For more infomation >> Nosso Grande Amigo WILSON. SAUDAES ETERNAS! - Duration: 2:06.
  For more infomation >> El miedo a ser deportada lleva a una madre a dejar a sus tres hijas bajo la custodia de la activista - Duration: 1:59.
  For more infomation >> El colapso de un edificio sepulta y mata a dos obreros en México - Duration: 1:53.
  For more infomation >> Niño muere baleado en un tiroteo y el momento queda grabado en Facebook Live - Duration: 0:30.
  For more infomation >> Robo de gasolina habría provocado una impresionante explosión en México - Duration: 0:30.
  For more infomation >> fairlife Milk
 For more infomation >> [포켓에디션,WIN10에디션탈출맵]스토리 탈출맵 by 골드스티브 - 생글이의 마인크래프트 - Duration: 10:10.
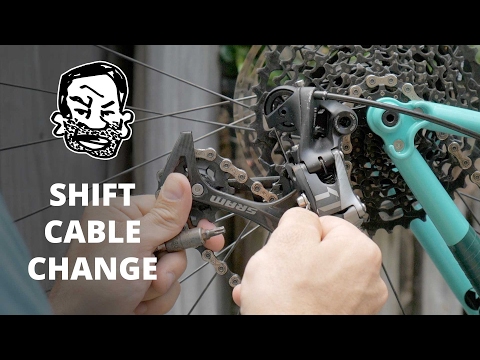
 For more infomation >> Victoria Wieck 11.94ctw Multigemstone Drop Earrings - Duration: 3:10.
 For more infomation >> Canon G7X Mark II Review After 6 Months of Daily Use | Best Camera for YouTube 2017 - Duration: 8:29.


 For more infomation >> Cultivate Goodness Of Heart - Duration: 4:02.

 For more infomation >> Victoria Wieck 6.28ctw Pink Amethyst Tulip 2Tone Ring - Duration: 4:27.


No comments:
Post a Comment