- Hey, how's it going do it yourself-ers?
Today, I am going to show you how you can conclusively and easily diagnose issues with
your alternator.
But not just that, I will also take an alternator apart and go over all the different components
that make up the alternator and how they work together as well.
And as if that wasn't enough, we'll go over some wiring diagrams and how you can read
them and make sense of your charging system too.
Alright, so if you suspect you have issues with your alternator and charging system in
general, the first thing you need to rule out is a bad battery.
The first thing you want to do is to do a close visual inspection of your battery terminals
and your battery terminal connectors.
Make sure there is no rust and corrosion between the terminal and the connectors, 'cause otherwise
that's gonna keep current from flowing through your charging system.
And this is what I'm talking about.
So if you're having issues with your car starting or having issues with your battery in general,
and you see this on your battery terminal connectors, this is the first thing that you
need to address.
You will need to remove this connector, clean the battery terminal and replace this connector
if it's as bad as this or clean it as well.
Now even if you're not having issues with your charging system, but have battery terminals
that look like that, you should either clean them or replace them.
Just so that you don't develop any issues in the future.
But for the sake of this video, we'll pretend that's not there and go on to the next step.
Which is to load test our battery using a load tester.
Now if you don't have on of these, don't worry.
I'll also show you how to do this using a multi-meter, but this is simply a way that's
done at different mechanic shops out there.
And the way these work is to first connect the black side to the negative side of your
battery and the red side to the positive side of your battery.
Then you want to take your voltage reading and you should have about 12 1/2 to 13 volts.
That's because contrary to popular belief a fully charged car battery is supposed to
have 12.6 volts and not 12 volts.
Because as you can see here, modern car batteries are made up of six 2.1 battery cells connected
in series together.
Alright next you wanna press this button and hold it for 10 seconds putting your car battery
under load.
And after 10 seconds, you wanna see your reading.
And as you can see our voltage drop is down to about 10.7 volts which indicates that we
have a good battery that's capable of putting out enough amps.
Now if the needle had dropped below 10 volts, it would be clearly in the weak area which
would mean the battery needs to be recharged and if it had dropped below nine volts, it
would pretty much mean you have a bad battery and you should replace it.
And if you find that your battery is weak and needs to be recharged, don't think that
you can simply drive your car and have your alternator recharge your battery.
A lot of times it doesn't work that way.
What you'll need to do is to trickle charge your battery using a battery charger like
this.
Now if you don't have a battery charger, you can obviously remove your battery, take it
to your local auto parts store and they'll recharge your battery for you.
But I find that these battery chargers pay for themselves even if they get you once out
of a jam, it's already paid for.
And in fact if you're interested in one of these and how much they cost along with any
other tools or products I'm gonna be using in this video, I put links to them in this
special box down below, so don't be afraid to click on them and check them out.
Now let me show how you can test your battery using a simple multimeter as well.
First thing you wanna do is to obviously turn on your multimeter and then you put your dial
at 20 on the DC voltage scale.
And then you wanna put your red test lead on the positive side and the black test lead
on the negative side and take your voltage reading.
As you can see, we've got 12.6 volts which is about perfect.
Now if you get a reading that's more than 12.6 volts, have no fear, that's simply surface
charge on your battery terminals.
However, if you want to have an accurate testing procedure, you'll need to get rid of that
surface charge.
And you can easily do that by turning on your headlights until you read 12.6 volts at your
battery.
Next I'm gonna use couple of these wires with these alligator clips at the end of them to
attach my test leads to my car's battery like this.
And next we wanna get in our car and start the engine and right when we crank the engine
in the first second or so we wanna make sure and write down how low our battery voltage
gets.
And we're basically load testing our battery using our starter because at no time is the
battery under more stress than the time your starter try to get your engine going from
a dead stop.
And once again we don't wanna see our voltage dip below 10.5 volts.
So as you just saw the lowest our battery voltage got while we were cranking the engine
was 10.9 volts, which means we have a good battery on this car.
So now we can move on to testing our alternator.
With our test leads still attached to the negative and the positive terminals of our
battery, we're going to start the car and the voltage reading you wanna see at the battery
with the engine running is 13.5 to about 15 volts.
Alright so as you can see we're getting about 14 1/2 volts which is just about right.
Now what we're gonna do next is to raise our RPM to about 2,500 and make sure that our
voltage here doesn't keep rising and stays steady.
And by doing that we make sure our voltage regulator, which is this guy, is doing its
job.
Which is to maintain the voltage and currents that's being produced at your alternator within
a specific range to your battery.
Now I'll explain in more detail how everything you see here works together later on in this
video.
Alright, so let's do the 2,500 RPM test.
So yeah and you wanna keep it at 2,500 for about 30 seconds to a minute to make sure
that voltage stays steady.
Alright, so if you get a voltage reading that's above 15 volts, than the most likely culprit
is going to be your voltage regulator.
Now most alternators these days come with internal voltage regulators, so you simply
might want to replace your alternator, but if you feel like it you can try to source
one of these, open up your alternator and replace the regulator only.
But if you have a voltage reading at your battery that's below 13 1/2 volts, here's
what you wanna do next.
First thing you wanna do is to turn the engine off and then check the condition of your drive
belt that's turning your alternator pulley.
We wanna make sure that it's not excessively loose, it's not badly damaged or torn.
Also do a close visual inspection of the pulley itself, make sure it doesn't have any obvious
signs of damage and that also it's not making any bearing or any other types of noises while
the engine is running as well.
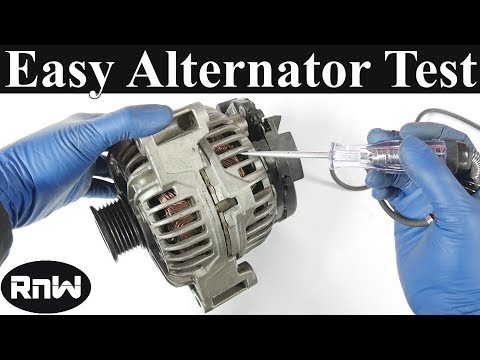
Next you wanna do a close visual inspection of this connector that goes to your alternator,
but more importantly this cable that's attached to this positive post that's on your alternator.
See this positive post is what's attached to this stator inside your alternator and
that's where the current is produced and that's how the power from your alternator gets transferred
through this cable back to the positive post of your battery and that's how your battery
gets recharged.
So the next check is with the engine running, we're gonna do a voltage test on the post
itself to see how much voltage we have at the post.
'Cause our alternator could be producing enough current at the post, but for whatever reason,
like corrosion or damage to this cable, some of that could get lost by the time it gets
to the positive post of our battery.
Alright so let's first start our engine.
Now we'll keep our black test leads still attached to the negative side of our battery.
And then with the negative post lead we gonna touch the post on our alternator.
And as you can see, we got 14.4, 14 1/2 volts here, which is what we have at the battery
as well.
Alright, so if the voltage you get at the positive post of your alternator is 14 1/2
volts, but let's say you only have 12 1/2 or less than 13 volts at the positive post
of your battery, that means that your alternator's working properly, but that voltage is being
lost somewhere from that post to the positive post of your battery.
That's the case, here's how you can find out where that voltage is getting lost.
So once again you grab your multimeter, keeping the dial on the same setting, we're going
to do a voltage drop test, which is a test to see how much voltage is lost between every
two points from that post to the battery.
Now to have an accurate voltage drop test, you'll need current flow through the circuit.
And as the car is sitting right now, it doesn't have a whole lot of current flow, so what
we're going to do next is to turn on all the accessories inside our car to put some demand
on the alternator and have some current flow.
So let's turn on our headlights, put our fan to the max position, turn on our AC.
Turn on our radio.
And I think that should be good enough.
And we're gonna start our voltage drop test at the point that's going to be the most likely
culprit, which is this corroded terminal right here.
So we get one test lead and put it on the post itself, grab the other test lead and
put it on the terminal.
And whatever number we see on our multimeter that's going to be the amount of voltage we're
losing when voltage goes from this terminal to the positive post of the battery.
As you can see, we got about .01, .02, depending on where I'm putting this black test lead,
which is really nothing.
Alright, so the next place you should check is from where it goes from the stud to this
cable.
So again one test lead on the stud and the other one on the cable itself.
And we gotta record our voltage loss and again there isn't any on this car.
So nine out of 10 times your voltage loss is going to be in one of those two places,
especially this one.
But if it's not there, then you simply just keep going down this line.
So on this car, this line from there goes to the junction box first, then it goes through
this 120 amp main fuse, then back out the junction box and to the car battery.
And if you're wondering on this car, the total voltage loss from the positive post of the
alternator to the positive post of the battery is .07, .08 volts, which is well within spec
of .2 volts.
Alright so that was the voltage drop test from the positive side of the alternator to
the battery, but you also need to do a voltage drop test from the negative side of the alternator
to the battery as well.
Because in order for current to flow, the alternator needs to be grounded.
Now your alternator is grounded through your engine which is grounded through your chassis
by cable, by grounding cable and your chassis is obviously grounded back to the negative
side of your battery since that's also connected to the chassis as well.
So in order to test the ground circuit, you put one test lead on the negative side of
your battery and grab the other test lead and put it on the case of your alternator.
And if you get a reading, you wanna make sure it's not above 0.2 volts.
And as you can see here, we have no voltage loss whatsoever.
And if you get a reading that's above 0.2 volts, you wanna check your alternator to
your engine.
So you get one test lead on the alternator casing, grab the other one, put it on your
engine and see how much voltage you lose there.
And then you can simply work your way back to it.
You go from the engine to the chassis.
And by the way on the chassis side, you can put your test lead on any of these bolts or
screws that are bolted into your chassis.
And then you do a voltage drop test from your chassis to your negative battery terminal
as well.
You'll find the voltage drop believe me.
Nine out of 10 times, it'll be at your battery terminals.
Make that 95 out of 100 times.
Alright so that's how you do a voltage drop test to see where you're losing voltage when
you go from a working alternator to the post of your car's battery.
But now let's move back a little bit and go to where we check voltage at the positive
post of our alternator while the engine was running.
And let's say that we only have battery voltage or just below battery voltage at this post.
If that's the case, you could have a bad alternator, but before you condemn the alternator you
need to check and make sure that the actually voltage is being supplied to the voltage regulator
inside your alternator through the connector that's on there.
See these two wires here?
One of them carries battery voltage to the voltage regulator inside your alternator and
your alternator needs that battery voltage in order to be able to produce current which
in turn will recharge your battery.
Alright so here's how your alternator works.
So a lot of times you have two wires going to two wire connector on your alternator.
These go straight to your voltage regulator.
So one of them carries battery voltage to one of these brushes that you see here and
the other one has ground since your voltage regulator is grounded through your alternator
which is grounded through your engine.
So we have both power and ground on these spring loaded brushes.
And those two brushes make contact with these two slip rings that are on your rotor.
See on this alternator, this voltage regulator goes on like this and right there you can
see it make contact with the slip rings.
So power and ground comes through these two slip rings and it goes through this winding
around your rotor.
You might see it better at this angle.
Each one of these slip rings is connected to one end of this winding that's going through
this rotor.
And as you have both power and ground through this field winding, you create an electromagnetic
field.
Now your electromagnetic field goes inside of your stator.
Which is basically three sets of windings that go through here as you can see.
And as your drive bolt turns the rotor and the field winding with the electromagnetic
field around it, that field induces current through your stator.
Now since the current that's being produced at your stator it's AC and the car or your
battery uses DC voltage, that needs to be converted to DC voltage.
And that's where these diodes come in.
You have two diodes for each winding that's going through your stator and since you have
three windings, you have six diodes in total which turn that AC current into DC.
And this piece with the diodes in it it's called the rectifier.
And that from there, the DC voltage or current goes from this positive post of your alternator
back to the positive post of your battery and recharges your battery.
Now since your engine spins at different RPMs, it's going to vary greatly the amount of current
that's going to get produced at your stator.
But that's where your voltage regulator comes in.
It varies the voltage that's going through your rotor based on how fast or how much current
is being produced at your stator and makes sure that current or voltage stays within
a certain range.
So in so many words, if you don't have battery voltage going to your alternator, you're not
gonna have an electromagnetic field and you're not going to be able to produce any current.
Now lucky for you checking for that is pretty easy.
What you wanna do is to get in your car, put your key in the ignition and turn it to the
on position.
Then grab yourself a test light.
Attach one end to the ground side of your battery and then with the other end, probe
the two pins on your connector and you should have power in at least one of them.
If you don't have power there, the next thing you need to check is the fuse for your alternator
at your junction box.
Alright so now let's make sense of it on a wiring diagram as well.
Now this wiring diagram is for an F150 since I don't have the wiring diagram for the Subaru
that we got here today, but they work very similar to each other.
So here's the power side that comes in, goes through the fuse, through your junction box.
And it gets fed to your regulator here.
It also gets split off from this side and goes to your brushes.
These are supposed to be your brushes on this diagram which go to your rotor.
This here is your stator with three windings inside there.
As they spin, they produce current, which goes through these diodes and goes back around
or out of this B plus or the positive post of your alternator back to your battery.
Now similar to this Subaru, there's also a second wire in that connector.
The second wire is for the battery warning lamp that's inside your cluster.
Talking about that guy right there.
So when you turn your key to the run or start position, you allow current to flow through
this fuse to this lamp inside your dash.
Now when the engine is not spinning, your voltage regulator grounds this wire and illuminates
the battery warning lamp inside your dash.
But once the engine starts spinning and starts producing current at your alternator, the
regulator opens this up and your battery warning lamp or light goes out.
Jose if you don't stop horsing around while I'm shooting, I'm gonna return you.
I'm gonna take you back right where I found you man.
Right on the side of the road.
Now if you're interested in knowing more about alternators, how they work or maybe how you
can open them up and rebuild them for example, there is a YouTuber which I put a link to
channel right below on the screen somewhere, which has a YouTube channel based solely on
alternators.
And it's a very informative channel, I definitely recommend you check him out.
So yeah, thanks for watching.
I'll see you guys next time.


 For more infomation >> La evidencia no pertenece al cerebro (sub. español) - Duration: 19:20.

 For more infomation >> LONG STORY SHORT, I DECIDED TO PREPARE FOR SUMMER - Duration: 2:08.
 For more infomation >> Entrevista de Harry con Zach Sang Show - ACTIVAR SUBTITULOS. - Duration: 18:57.
  For more infomation >> Kara Sevda 67//Paseo en el parque - Duration: 4:53.
  For more infomation >> [大悲咒][悼][美女作家林奕含之死][狼師陳興][補教名師敗類][躲那裡去][全民一起來][通緝狼師][抓狼師][替曾經被狼師欺負][所有人站出來][猴子哥哥][0932256199] - Duration: 4:05.

 For more infomation >> Bleed It Out (Live @ Road To Revolution)(Legendado PT-BR -- CC) - Duration: 11:54.

 For more infomation >> Сборник. Круг.Квадрат.Треугольник - Развивающие мультики про геометрические фигуры для детей - Duration: 5:37.


 For more infomation >> Donald Trump "I think I'm young" - Duration: 0:11.
  For more infomation >> VLOG | What I Ate & Free Food | VEGAN - Duration: 12:03.
 For more infomation >> sykkler i gjen - Duration: 1:59.
 For more infomation >> Citroën Xsara Break 1.6I-16V DIFFÉRENCE AIRCO, CRUISE ZEER NETTE AUTO! - Duration: 0:56.
  For more infomation >> Casamento Márcia e Salomão parte I - Duration: 1:17:12.
 For more infomation >> :0134: Bark Graft My Pear / اپنی ناشپاتی پر بارک گرافٹ - Duration: 8:39.
 For more infomation >> Trick to Create Canaries with Success and Very Easy | PART 1 | - Duration: 5:45.
  For more infomation >> Q&A- SKAM, muzyka, wracam do Polski!? Byłam buntowniczka? - Duration: 17:50.
 For more infomation >> Steven Universe: Ten dobry Lars | The Good Lars [CAŁY ODCINEK] cz.1 (Napisy PL) - Duration: 4:04.
  For more infomation >> Making my sister get mad at me. - Duration: 0:23.
  For more infomation >> Soy Luna 2-Fer dowiaduje się o jej ,,związku'' z Matteo/cz1[Tłumaczenie PL]Odc.13 - Duration: 0:32.
 For more infomation >> Soy Luna 2-Fer dowiaduje się o jej ,,związku'' z Matteo/cz2[Tłumaczenie PL]Odc.13 - Duration: 0:29.

 For more infomation >> Gimp for Beginners - Part 1 - Duration: 1:49.
 For more infomation >> TERRAS SEM SOMBRA EM SERPA 2017 - Duration: 5:41.
  For more infomation >> AYDA KUTAY TELEFON NUMARASI - Duration: 10:46.
  For more infomation >> Ceyhan Prensi #O Şimdi Asker Official Video Klip - Duration: 3:45.
No comments:
Post a Comment