What is up guys, my name is Pete from
the Gaming Careers YouTube channel and
today we're going to be looking at
OBS Studio again, specifically how you
add sources to OBS Studio, so things like
your game, your webcam, your overlay, things
that really make your stream standout
and look more appealing to viewers. Now I'm
hoping a lot of you have already seen
our OBS Studio tutorial, where we looked in depth
into the setting behind OBS Studio,
things like which Twitch server to
stream to, what bitrate, what FPS, what
resolution. We covered a video really in
detail looking at the settings behind OBS
Studio, so if you haven't already seen that
and set up your OBS Studio then
you can click the annotation up here
which will link you to the really
in-depth 20 minute tutorial which is
going to get your OBS set up in the
perfect way. If you're confident that you're
completely set up in terms of OBS
settings then let's jump into adding
sources in OBS studio.
So as you can see we're now in OBS studio
and I've just got an example scene
up with multiple different sources, the
kind of thing that we're going to be
creating today. So as you can see in the
scene we've got a webcam, we've got a game,
we've got an overlay and we've got some
text which are the four different
sources that we're going to be covering
in this video. So it's worth quickly
mentioning what the difference between
a Source and a Scene is, because if
you're new to OBS you might not quite
understand the terminology. If you look
down in the bottom left you can see that
we can have multiple different Scenes in
our OBS window. A Scene is basically a
collection of Sources so you could have
different scenes for different games if
you're a variety streamer or you could
have maybe one which just has your
webcam and chat on for if you're in
between queues in a competitive game
but effectively a scene is a collection
of sources that appear on screen
together. So a Source is effectively
something that appears on screen within
one of your scenes. So something like
your video game that will be a source,
your webcam would be a source, your overlay
and some chat or text that could also be
a source. So a source is something that appears on
screen and a scene is a collection of
sources. So the first thing we're gonna
be covering in this video is how you add
your video game to OBS. The first thing
that you need to make sure that you have
is your video game running on your
computer, when you're in your video game
it's worth just quickly looking at your
game settings. So if you go into your
video options from within the game and
see what you have selected for display mode.
Typically if you have it set to full
screen that should give you the best
frame rates in game but it can give you
some heavy delays when Alt Tabbing.
Which is probably something you are going to have
to do a fair amount especially if you
only have a single monitor and you're going
to want to be reading Twitch chat. If you
are going to be Alt Tabbing a lot, you
don't have a second monitor that you can
quickly refer to, then you're probably
going to want to set the game to run in a
borderless window. This basically makes
the game seem like it's running full
screen, but it's actually running in a window
so you can Alt-Tab much much quicker
but it will be at the expense of some
FPS loss. So now you've got your game
running and you have your display mode
set how you want it, you want to go back
to OBS and there's a few different
methods that you can use to capture your game,
some methods work better than others and
it completely depends on the game.
Since every game is coded differently by different
companies, they may require a slightly
different set ups in OBS. There's
absolutely loads of information on the
OBS forums which I've linked in the
description below, so if you're having
issues with a specific game
make sure you go to the OBS forums and
see if anyone else had a similar issue.
Now there are three different methods
that I would recommend for capturing
your game, I would start with Game
Capture and if that doesn't work go to
Window Capture and if that doesn't work
finally go to Display Capture. I'm going
to cover all three of them quickly now.
So if we start with Game Capture, if you
go down to the menu and click the + icon
or you can right-click and choose add,
and we want to select Game Capture.
Here you can enter the name of the application if
you want to, I would just recommend
entering the name of the game that
you're gonna be capturing. Now the
default mode that should pop up should
say "capture any full screen application",
I've had some trouble with this it
doesn't seem to always be able to find
my game running, so sometimes you'll have
to change this mode to "capture specific
window" and then select the right window
in the drop-down below. And you can leave
the window match priority on executable
name. Multi adapter settings,
this is an option if you're using
multiple graphic cards, so something like
crossfire or SLI technology then you
want to be enabling this option just to
get the full performance benefits of
having multiple graphics cards. The force
scaling option is useful for downscaling
resolutions, so if you need to do that you
can enter your custom resolution here.
You can leave allow transparency
unchecked because not many games need
transparency, but if you do require
this option then this is where you can
enable it. Now the limit capture frame
rate option is if you are capturing a
game at a very high frame rate, so let's say
you're playing something like CS:GO or
Overwatch and you want to keep a high
frame rate in game, something like
144 FPS because you have a
high monitor refresh rate. If you enable
this option, it would let OBS capture at
a lower frame say 30 or 60 FPS because
that's what you're actually streaming at.
So it can be useful to test this
option if you're having some sort of FPS
issues. I actually leave it unchecked
because I've got quite a good computer
but I have used it in the past when I've
had a worse system. The capture cursor
options does exactly as it says allows you
to be able to capture your mouse.
Now there's a lot of debate around the use
anti-cheat compatibility hook option, this
basically just may need to be enabled for
OBS to work with some games. So if you're
having trouble capturing a game maybe
you're just getting a black screen even
though you've selected the exact game
that you want to capture, you may just be
worth enabling this option to make sure
that it's not the anti cheat that is
stopping you from being able to capture
the game in OBS. If you wanna be able to
capture your overlays like Steam overlay,
then you can enable "capture third party
overlays" but I don't really know why
you'd want to do that. Hopefully by now
you should have a preview of your game
and you can hit OK and you can see the
game in your stream. As I mentioned
before, Game Capture is the method I would
mostly recommend because if it does work
for you then it should give you the best
performance of capture both in game and
in OBS. If however you've been
unsuccessful in getting your game to
show in OBS using Game Capture and you've tried
using the capture specific window and
enabling the anti-cheat hook and it still
hasn't helped at all, I would recommend
then going to Window Capture. Adding the
window capture is pretty much the exact
same as a game capture, click the + icon
and choose window capture and then the
settings are pretty self-explanatory.
If you're still having issues capturing
the game using window capture and the
last option I would try is Display
Capture, where you actually choose one of
your monitors to constantly capture.
Obviously the downside of this is that it
captures everything within the monitor,
so if you Alt Tab to a window behind the
game like Spotify or your chat, then the
stream will also show that which it
wouldn't for Game Capture or Window Capture.
Hopefully using one of those three
capture methods you now have your game
running in your stream, so you can
finally just move it around and size it to
make sure it fills the whole window.
The next thing we're going to be adding
is an overlay now overlays really give
you the opportunity to make your stream
stand out from every other stream on
Twitch, you can use some personal
branding and color schemes that you kept
consistent throughout your Twitch
streams and YouTube channel. You can also
promote your social media through images on your
stream through overlays. Now i'm not going to
go through where you should get your overlays from,
there are absolutely loads of websites offering both free and premium
stream overlays, so if you just Google
search for Stream Overlays or something similar,
you'll get absolutely loads of options.
However if you are good with photoshop, I
would recommend designing your own
stream overlay, that way you're going
to be completely unique to anybody else on
the internet and on Twitch. If there's enough of
a demand for this I'll create a video on
how you create your own overlays in
Photoshop so let me know down in the
comments if that's something you'd like
to see. So to add an overlay we're gonna go to
add and then image, I would recommend here
naming it something easy so you can
identify it, you don't want to accidentally
disable this if it's going to be
constant on your game. Next you want to
be browsing for the image on your hard
drive that you want to use an overlay
and there's an option for unloading the
image when it's not in use, but I'd recommend
leaving this disabled. Now you should see
your image on screen with a red box
around it. You can resize this just like
you would in Photoshop just by dragging
the bottom corners, and you can
also move it around by holding the mouse
button and dragging it around the stream
preview. Since this is my webcam overlay, I'm
going to be moving this up into the top
left corner and sizing it appropriately.
Also a neat little trick is you can hold
down the Alt Key on your keyboard and
you can crop the sides of the image so
if you want to get it closer positioned in
the top-left like I do here, you can see I'm
holding down Alt and cropping the image
that I can move it closer to the corner.
If you right-click on the image, you can
go down to transform and you can do some
transformations such as flipping it
horizontally or vertically, or rotating
the image. It's also worth mentioning
here that in the sources window down
here, you need to make sure you have
things layered on top of each other as you
want to see them on stream. So if you see that I
put my overlay below my game, it no
longer appears on the stream because
it's below the game window. So I move it
back above and you can see it on top of
the game window again. Right I'm pretty happy
with that the now until we add our
webcam but next we're going to be
looking at adding text into our stream.
So as I'm sure you've guessed by now you
go down to the plus icon again and add
Text(GDI+), name it something so that you
don't forget what it is and here you can
now select your font, font style, font
size and any effects.
I really have to stress something here,
if you want to make your text bigger or
smaller you should absolutely be coming
back into the properties window and
changing the font size. You shouldn't be
dragging the corner of the text and
scaling it to make it bigger, because as
you can see here it starts to look quite
pixelated. So to get back to font size,
just right click on the text layer, click
on properties and you'll be back and you
can then change the font size here.
The read from file option allows OBS to take
its text input from a separate text file,
this is useful for things like now
playing bars where you want to show the
music playing from a music player, but
this is something that we're going to be
covering in a separate specific guide so
make sure you check out the Gaming Careers
YouTube channel for when that's released.
So in this box you want to be typing in the
text you want to display and you can
select the color of the text as well as
the opacity.
If you want to apply a gradient to your text color then you can
set that here and here for a text
background. And finally here is where you
can select the text alignment and if you
want to use some custom text extents, but
the majority of users probably won't
need to be touching that. Just as with
your overlay image you can now drag your
text around the screen and position it
exactly where you want it to be
positioned, just make sure again that it is
in the right layer it should be above
your overlay if you wanting the text
to appear aobve an overlay. Now although
I've just created that text for my
webcam overlay I actually have already
created something in Photoshop which
also has the YouTube logo, so I'm going
to add it back as an image and I'd
recommend doing the same. The text in
OBS is decent and you have a lot of
customization but you don't have the
same level that you would in Photoshop
and since you can set the stream up
exactly as you want to, create something
that looks appealing in photoshop and
then just import it as an image into OBS.
The final thing we're going to going through
in this video is adding a webcam to your
stream. So to add a webcam you want to press
the + icon and then go to video capture device.
Select your webcam from the device list,
make sure it's all plugged in by USB and all
that kind of stuff, here you can see I've
added my webcam. So deactivate will
disable the device so it will disable the
webcam in this case. Configure video, this
opens up the device settings so when you
first installed your webcam to your
computer you will have probably
installed some kind of software.
If its logitech then there's some logitech
software and it enables you to make some
changes to the settings of the webcam.
Configure crossbar this is really just
an advanced option for people that are
using capture cards, because this is also
how you would set up a capture card
through video capture device. So you
don't need to worry about that for a
webcam. Resolution and FPS type, this just
enables us to directly configure the
devices resolution and FPS so if you
want to play around with custom
resolution or different FPS then this is
where you do that. Everything else really
can just be left on its default, most of
them are people that are trying to
configure their capture card and want some
more advanced settings.
Finally we want to play around with the
scale and the position and the cropping
of the webcam to make sure it fits into
our nice little overlay. Remember the
trick that I told you about holding down
Alt so that you can crop the size of the
webcam and finally you want to make sure
that your positioning this below the
overlay but above your game in the OBS
window. That's pretty much it guys, so
hopefully by now you have a stream setup
with game, overlay, webcam and some text.
We're going to be doing more advanced
guides on adding sources like your music
tickers, your Twitch alerts, Twitch chat, things
like that in specific videos coming up
on the Gaming Careers YouTube channel,
so make sure you subscribe if you haven't
already. I have a good Question of the Day
today, it's going to be which method of
capturing your game did you end up using
and what game were you trying to capture.
So was it game capture, window capture,
or display capture. If you can leave that
down in the comments that's going to be super
helpful for people that stumble across
this video and are looking to stream the
same game that you are and have
struggled with maybe one of the options
and can read in the comments how you
captured that specific game. So for me, I'm
going to say Overwatch and I used game
capture. Thanks so much for watching guys,
if you have enjoyed this video
and watched it to this point please do give it
a thumbs up, that that really does help us grow.
And I will see you guys in the next video!
Peace!
 For more infomation >> 4 Razones Por el Cual El Colágeno Va a Mejorar su Entrenamiento. - Duration: 3:43.
 For more infomation >> GF ANDORA RACE | I bring mine ... - Duration: 9:11.
  For more infomation >> Artist Zayn Malik Live

 For more infomation >> Renault Scénic 1.6-16V Privilège Luxe - Duration: 0:51.
 For more infomation >> Дмитрий Шепелев задумался о новых отношениях #ValeryAliakseyeu - Duration: 2:52.
 For more infomation >> Подборка лучших вайнов | М&Ж вайны #031 - Duration: 10:11.


 For more infomation >> Social Proof Marketing manipuliert die Massen - Duration: 1:43.
  For more infomation >> Zmierzch Tykających Zombiaków: historia i upadek serii Dead Rising - Duration: 43:41.

 For more infomation >> Citroën Berlingo 1.6i Multispace Attraction - Duration: 0:51.
  For more infomation >> Opel Corsa 1.2i 16V 5-DRS BLITZ ECC NAVIGATIE CRUISE PDC LMV - Duration: 1:53.
 For more infomation >> The clubroom attacked! - Yamada-kun and the 7 Witches (50) (ENG, ESP, CAT SUBS) - Duration: 3:57.

 For more infomation >> A Musical Liddy Livetweets - Duration: 6:39.
  For more infomation >> USS Monterey comes home after 7-month deployment - Duration: 1:33.
 For more infomation >> ASKO RFN2283W Kyl-Frysar - Duration: 1:27.
  For more infomation >> 10 Awesome Things To Do in Reykjavik | Travel Better in... ICELAND! 🏙✈😊 - Duration: 2:29.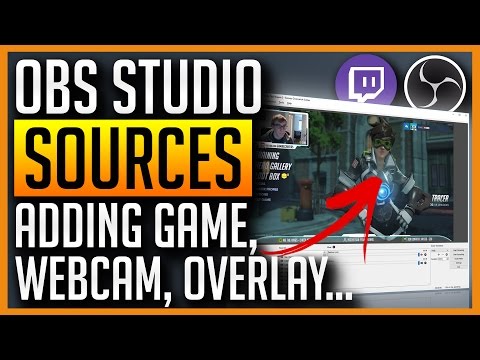
 For more infomation >> TRANS GIRL DENYING BIOLOGY (wtf again) - Duration: 5:15.
 For more infomation >> 7 Tricks For A Man To Fall Madly In Love With You - Duration: 3:28.
 For more infomation >> Pais Não Morrem—O Trabalho de Byron Katie - Duration: 10:15.
  For more infomation >> Profissão SUS: Dia do Farmacêutico - Duration: 1:06.
 For more infomation >> Huevo Sorpresa Gigante de Rocky de Paw Patrol en Español de Plastilina Play Doh - Duration: 11:18.
  For more infomation >> Breaking News , President Donald Trump being sworn in - Trump inauguration - Duration: 2:31.
 For more infomation >> New Naqabat 2017-New kallam Palo si allah ta allah he allah By Syed Hasan Raza Kazmi 2017 - Duration: 7:07.
  For more infomation >> Trump contraria os valores dos fundadores dos EUA - Duration: 1:17.

No comments:
Post a Comment