Hi. This is Marty from Blue Lightning TV.
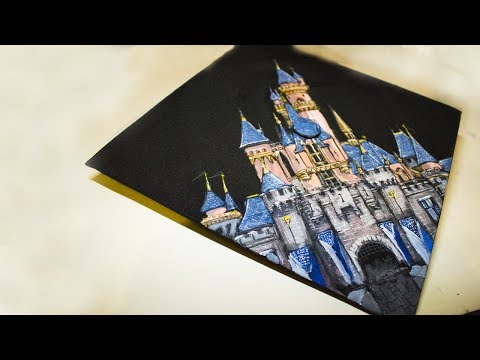
I'm going to show you how to create dramatically-lit, gold-leaf text on a leather-bound book cover.
This is an update of a tutorial I did many years ago on an earlier version of Photoshop.
This update is more streamlined and gives you more control with results that are more refined.
I provide this leather texture that you can download, so you can follow along.
Its link is located in my video's description or project files below.
The first step is create a displacement map of the leather texture that will use to wrap
our text around.
This will give our text subtle irregularities that conform to the surface of the leather.
We'll desaturate the color by pressing Ctrl or Cmd + Shift + U.
Next, we'll exaggerate its contrast by pressing Ctrl or Cmd + L to open the Levels window.
In the Input white field, type in 129 and click OK or press Enter or Return.
Since displacement maps look better when they're slightly blurred, go to Filter, Blur and Gaussian Blur.
Blur it 1.5 pixels.
Save the image by going to File and "Save As".
Save it to your desktop and name it, "Displacement Map".
Save it as a Photoshop PSD file, save "As a Copy" and click "Save".
In your History panel, click, "Leather texture" to open the image.
If you don't see the History panel, go to Window and History.
Click the New Layer icon to make a new layer.
If your foreground and background colors aren't black and white respectively, press "D" on your keyboard.
Click the background color to open the Color Picker.
In the hexadecimal field, type in: 87681E.
Now, the background color is the color we just typed in.
Go to Filter, Render and Clouds.
Go to Image, Adjustments and "Brightness/Contrast".
Make the Brightness: 40 and the Contrast: 30.
Go to Filter and Filter Gallery.
Open the "Distort" folder and click "Glass".
Make the Distortion: 18, the Smoothness: 4, the Texture: Frosted and the Scaling: 200.
Next, we'll add the title of your book.
Open your "Horizontal Type Tool" and pick a font.
I'm using "Times New Roman Regular".
If you don't already have it, I provided its link, as well.
I'll start with a point size of 118, Sharp and Center Alignment.
Click the color box and pick white.
Click on your document and type out your text.
If you want to increase the size of a character, highlight it and type in a higher point size.
To make another character the same size, just highlight it.
To adjust the "kerning", which is the space between two characters, which is called "kerning",
click between those characters and press Alt or Option + the right or left arrow on your keyboard.
To reposition your text, open your Move Tool and move it.
If you want to add more text below it, open your Type Tool again and click on your document.
Adjust its point size and type out your text.
If you'd like to make the bottom line bigger, highlight it and type in a higher point size.
To close the space between the two lines of text, click the "Character/Paragraph" icon
or go to Window and Character.
In the "Character" panel, go to the "Baseline Shift" icon and drag your cursor to the right
to raise up the bottom line.
I'd like to italicize the bottom two lines.
To do this, I'll double-click the large "T" of the layer to highlight both lines and click
the "Faux Italic" icon.
To slide your new lines of text up, open your Move Tool and press and hold the Up arrow on your keyboard.
We'll make all of our text into one Smart Object by Shift-clicking your other text layer
to make it active, as well, and click "Convert to Smart Object".
We can close the Character panel now.
To center the text on your document, press Ctrl or Cmd + A to select the canvas and click
the "Align Horizontal Centers" icon and the "Align Vertical Centers" icon.
To deselect it, press Ctrl or Cmd + D. Because we're going to ultimately place our image
in perspective, it'll better if we lower out text on the document quite a bit.
You'll see why later when we're at that point.
To lower your text, just press the Down arrow on your keyboard.
Go to Filter, Distort and Displace.
Displace the Horizontal and Vertical Scales: 2, Stretch to Fit and Repeat Edge Pixels.
Find and click the "Displacement Map" file that you saved at the beginning and click Open.
The Displacement Map made the edges of our text conform to the contours of leather texture.
Change the Blend Mode to "Overlay".
Ctrl-click or Cmd-click the thumbnail of the text to make a selection of it.
We'll convert the two top layers into one Smart Object.
Click the Layer Mask icon to make a layer mask of the selection next to the Smart Object.
Next, we'll angle our image's perspective, but first, convert both layers into a Smart
object, so we can adjust the perspective of both layers at the same time, as well as,
apply a lighting effect to the overall image later.
Open your Transform Tool by pressing Ctrl or Cmd +T. Go to Edit, Transform and Perspective.
Go to a bottom corner and drag it out approximately this much.
Then, press Enter or Return.
By lowering our text earlier, it's now optically balanced on our document.
Lastly, we'll add a dramatic lighting effect.
Go to Filter, Render and Lighting Effects.
The Lighting Effects filter works only if you have a supported video card and only on
8-bit RGB images in Photoshop CC.
To check your Image Mode, go to Image and Mode.
Make sure it's RGB color/8 bits/Channel.
Once you open the Lighting Effects filter, if you don't see the bounding shapes, press
Ctrl or Cmd + H. Zoom out by pressing Ctrl or Cmd and the minus key on your keyboard
until you see most of the bounding shapes.
In the Properties panel, choose, "Spot".
The color is white, the Intensity is 75, the Hotspot is 77, the Exposure is minus 54 and
the Gloss is minus 8.
Metallic is 100 and the Ambiance is 44.
The Texture is None.
Drag inside the lighting effect to position it over your image.
To rotate it, go outside and rotate it.
Continue this until you like it's angle and position.
Then, click OK at the top.
To fit it onto your canvas, press Ctrl or Cmd + 0.
This is Marty from Blue Lightning TV.
Thanks for watching!

 For more infomation >> Toyota Yaris 1.3 16V VVT-I 3DRS ASPIRATION "AUTOMAAT" AC/CV+AB/44.000KM! - Duration: 0:54.


 For more infomation >> Tổng hợp những pha hại não của PewPew - Pewdeptrai #3 - Duration: 12:26.
  For more infomation >> [어제TV]'미우새' 천하의 김건모도 탈북미녀 이소율 앞에선 순한 양 - Duration: 3:04.
  For more infomation >> [단독] 서장훈, 규현 빈자리 메운다..'라디오스타' 스페셜MC - Duration: 2:00.
  For more infomation >> 1475 Telemensagem Dia dos Namorados Evangélico - Voz Fem. - Duration: 0:45.
  For more infomation >> 1497 Telemensagem Dia dos Namorados Evangélico - Voz Masc. - Duration: 0:45.
No comments:
Post a Comment