hey guys welcome back to my channel today I'm going to show you fun and easy
DIY craft ideas to do when you're bored if you enjoy this video please click
that like button and if you'd like to see more fun DIY videos please click that subscribe button
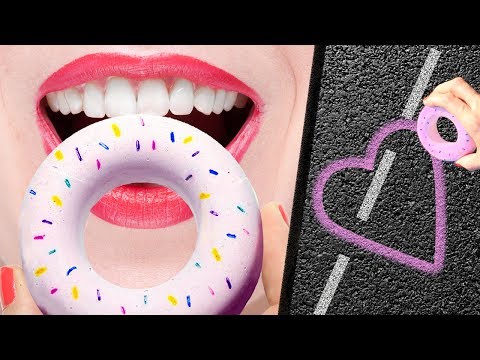
the first project will be DIY donut chalk
I started by mixing from white and red washable paint together till I got a pink color
next I recommend using a bowl or a cup that you will throw away I'm
going to add a half a cup of warm water along with my paint that I just mixed up
and I'm going to stir that together
once the paint in water are all mixed together I'm going to slowly start
adding in 1 cup of plaster of Paris
at this point if you find the color of your mixture is too light just add some more pink and stir it together until you get
the color that you would like I will be using this silicone donut mold and I do
recommend that you use a silicone one as it is easier to release them
spoon the mixture into the mold and on one of them I sprinkled some sprinkles on the bottom
once the molds are full tap them a couple times to even amount and then you
can let that dry overnight or you can place them in the refrigerator for a
couple of hours once they were firm I removed them from the molds
to decorate one of the plain ones I used a sharpie to draw on some sprinkles
and that is how you make these easy non-edible donut chalks
the second project will be a DIY root beer float sugar scrub
to start in a mixing bowl I'm going to add 1/2 a cup of coconut oil whip the coconut in a mixer for
about 4 to 5 minutes
after the coconut oil had been whipped up I'm now going to add 3 tablespoons of grapeseed oil and whip that together
now I'm going to slowly start adding in a little bit more than a cup and a half
of sugar and I'm just going to add it a little bit of it at a time and stir it in
after the sugars mix in this is what it should look like now you'll want to take
and divide that mixture into two different bowls
to one of the halves of the mixture I'm going to add in some of this root beer flavoring
I will be using one of these mini mason jars start by spooning in the root beer
mixture into the mini mason jar and don't fill it all the way up leaving
room at the top to place some of the white sugar scrub
and the last thing I did was I just added some of that white sugar scrub to the top and then I added
a straw
and that is how you make these easy and cute mini root beer float sugar scrub
and if you want to put the lid on it to save it for later use to still fill so
much of the white scrub on the top - these would make great gifts or a great party favor
the third idea will be a liquid key chain
for this one you will need a bead or a lip balm container like this I'm going to use a paper clip and cut off
the top part of it glue the paper clips to the container
in a cup I'm going to mix together some water and some blue food coloring
I will be using one of these tiny ducks that is a bead place some hot glue on the ducks head and glue that
to the bead container right underneath where the paper clip is
next I poured the blue water into the container and I filled it about halfway up you want to
make it look like the duck is floating on top of the water make sure when you
screw the lid on you screw it on tight you can also add some hot glue around it
to make sure that nothing leaks out
now I'm going to add a jump ring and a keychain to the paperclip to turn this into the liquid keychain
and that's all there is to this DIY liquid keychain
the 4th idea will be DIY tumblr rings and I will show you two different ways to make this
the first one I'm going to show you you will need some clear shrinky dink film or paper
print out the images remember that when they shrink down they will
shrink down to about one third of the size place a piece of the shrinky dink
film over the top and tape it down
now I'm going to use some sharpies to color in my images
once mine were colored in then I cut them out and I left a border around each
of the images
here are both of mine after they were cut out
place them in the oven and bake them according to the package instructions
use tongs to remove them from the oven as they will be very hot
here are both of mine after they had cooled down
for these two I will be using these ring bases
super glue the image to the ring base
here are these two super cute rings the other way to make these I'm going to show you you will just want to take a
plastic water bottle like this and cut out a piece from the side
choose the image that you would like and for this one choose the exact size that you want
your ring place the plastic water bottle over the top and tape it down color the
image in with some sharpies
once the image was colored in I sprayed some hairspray on it to protect the image you can also use nail polish
once the hairspray and or nail polish is dry cut out the image
cut out a strip of foam that is about 1/2 an inch wide
wrap the piece of foam around the finger you want your ring on
mark off where the two meet and cut off the excess - glue the two ends together
the last thing that I did was I glued the image to the foam
that's how you make both versions of these DIY tumblr rings
the final project will be a DIY beach bag
for this one you will need some fabric or you can recycle an old t-shirt the next thing that you will need is a
zipper and I'm going to use this 14 inch white zipper
cut your fabric or t-shirtso you have two pieces that are 15 by 15
hot glue the fabric to the zipper just like this on both side
now unzip the zipper now this step is optional but I wanted a handle for my
bag so I'm going to use a piece of elastic I just cut a piece the size that
I wanted for my handle and then I folded that together and hot glued it
place the handle underneath the fabric where you would like it this is going to
be used just as a guide then hot glue around the sides but don't glue where
the handle is now hot glue the other side and the bottom
once it's all glued together turn the fabric inside out and glue the handle to
where the opening is on the side
and here is my bag at this point - I wanted to give this bag more of a beach look so I'm going to stick a piece
of poster board inside then I found this anchor stencil and I placed that on top
and then I just used some paint to color in the stencil
and here is my bag once the paint had dried now you can add your beach towel your sunscreen your lip gloss
whatever you would like to take to the beach and that is how you make these
easy DIY beach bags I hope you guys enjoyed all five of these DIY crafts
project leave me a comment let me know which one was your favorite as always
please remember to like subscribe comment and share until next time I hope
you guys all have an amazing day
 For more infomation >> How to Make Candlesticks ~ The Meaning of Candlesticks - Duration: 11:50.
  For more infomation >> Jaguar XJ 2.7D V6 R SOVEREIGN FULL OPTIONS !!! - Duration: 1:01.
  For more infomation >> Volvo V70 bjr 2012 2.0 D3 5-CIL 120kW/163pk Aut6 Summum Luxury R-Edition CLIMA + CRUISE + ADAPT.BI-X - Duration: 0:55.
  For more infomation >> La industria de videojuegos hoy en día (y su problema) - Duration: 11:24.

 For more infomation >> Sangrando profundo | Caso Cerrado | Telemundo - Duration: 15:14.


 For more infomation >> Victoria Wieck 3.83ctw Black Spinel Leather Strap Watch - Duration: 3:05.
  For more infomation >> Best Portable Air Conditioner Deals for Summer 2017! - Duration: 4:27.
  For more infomation >> ЭЛЕКТРОНИКА ДЛЯ ДОМА С ALIEXPRESS | ЭЛЕКТРОННЫЕ ГАДЖЕТЫ ИЗ КИТАЯ + КОНКУРС - Duration: 4:57.


No comments:
Post a Comment